Showing posts with label deals. Show all posts

Monday, May 7, 2012

Monday Menu Planning


Since the pantry is undergoing a facelift, I have dubbed this week "Clear Out Cooking".  This means I am strictly making meals based on what I have on hand.  I thought this would be a challenge but surprisingly enough it was easy to come up with 2 weeks worth of menu's.  I can't wait to see how small the grocery bill will be this week!

Monday
Dinner with Small Group

Tuesday 
Main: Oven Baked Chicken / Sides: Couscous and Steamed Veggies

Wednesday
Game Night - Dinner with Small Group

Thursday
Main: Chili Lime Steak Salad

Friday
Main: Bar-b-que Chicken / Sides: Potatoes and Broccoli

Saturday
Main: Date Night (WOOHOO)!

Sunday
Main: Left Overs

Friday, May 4, 2012

Fab Refurb: Bedroom Dresser - Progress update 1

I have to apologize, I keep forgetting to take pictures during the day, so these are a little dark.  I promise the next set will be better :).

The primer is all dry and so I was able to lay down the first coat of paint.  I decided to use Rust-Oleum Heirloom White paint.  After the first coat the dresser was looking beautiful...
I adore those drawer fronts...
The bottom drawers were looking good...
The back detailing is beautiful...

After the first coat I sanded the entire piece down with 220 sand paper to get all the little bumps out, then came a light cleaning to remove all the sanding dust.  I decided to do another coat today and the finished product looks AMAZING!  Tomorrow I hope to add the clear coat and move this baby in to her new home!  Now on to find drawer pulls.

Blessings!

Wednesday, May 2, 2012

Fab Refurb: Bedroom Dresser

I am SO excited to share this refurb with you!  Since moving to NY we have been on the hunt for a dresser to go along with our vintage romantic inspired master bedroom.  I have been checking second hand stores and craigslist, but with a budget of only $50 it has not been easy.  Well while I was sick and stalking craigslist to pass the time, I spotted this baby for just $40 (yes it does have drawers, I took them out before I took the picture)...
I was beside myself when I got the email that I was the first one!  So helpful hubby headed out to pick it up for me.  He checked over the piece to make sure it was just cosmetic issues and hauled it home.  Once I was healthy enough I began the refurb with a good cleaning... 
I always wonder what a piece of furniture has seen in it's lifetime and I'm guessing this one has seen ALOT!  The doors were the worst, but it really just looked like a staining gone bad.  The top had water damage but just on the surface, nothing a good cleaning couldn't take care of...
The exterior drawers have been stripped and stained and stripped again so I decided they needed to be painted as well.  I will be changing the hardware as well, just not a fan of those drawer pulls...
The interior drawers were the nicest part.  I am guessing this is what the original piece looked like.  The jury is still out on whether they will be painted or not.  I just love the rich tones and with some wood conditioner they would sparkle!
Upon further inspection of the interior I found the LAYERS of paint and stian this dresser has seen.  After seeing this it was settled that this piece would be painted...
The legs were in great shape with the exception of a few chips.  Nothing a hammer, screw driver and a little patients couldn't take care of...
After a GOOD cleaning and several days of researching painting furniture I decided to use spray paint this time around.  I started with Rust-Oleum Primer...
After the first coat of primer you could really see the true beauty of this piece and all the little intricate details...
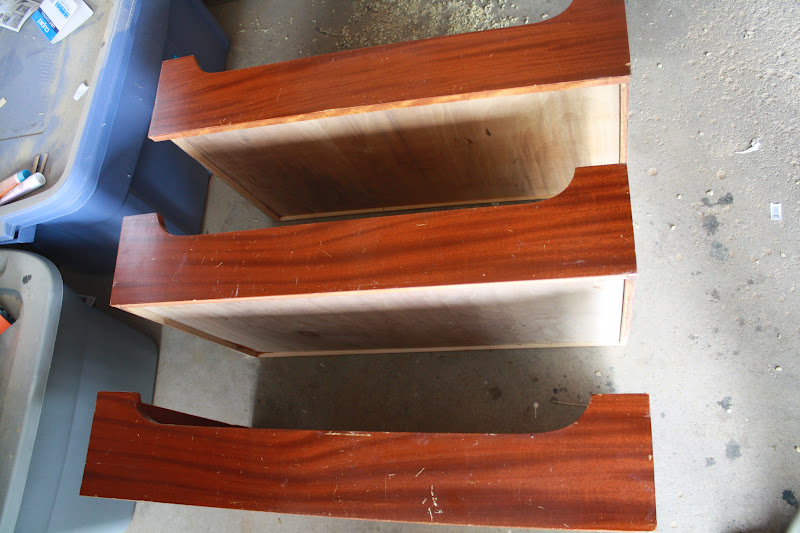
 Even the detail on the drawers could be seen a little better...
I decided to do two coats of primer since I was going from dark to Heirloom White.  I am getting so excited to see this piece finished...that will be a few days no doubt!

Blessings!

Monday, April 30, 2012

DIY: Va-Va-Va-Vase

Since taking down the Easter decor I decided it was time to start on a summer centerpiece for our dining room table.  A friend had told me about a segment on The Chew where Clinton Kelly had made a summer table scape out of hardware supplies.  After watching the segment on the internet I was inspired and decided I needed to start with a vase.  Enter this beautiful bottle I have had in my stash awaiting the perfect project...
 I pulled out two of my FAVORITE craft supplies, Jute and Mod Podge!  I wanted a vase that was functional and earthy so it wouldn't take away from brightly colored summer flowers...
I started by painting mod podge onto a section and began wrapping the jute over the mod podge.  It did take alot of mod podge and I will admit it was a messy project...
But when I was finished it was worth it.  I decided to make a design in the middle and space out the top to show some of the beautiful glass below.  I put the vase by an open window to help it dry...  
Before to long my vase was dry and I love how mod podge dries clear!  It is the perfect summer vase (if it would hurry up and be summer).  I added the only two flowers we had in our front yard, along with two candles I had on hand.  The candle holders are actually plumbing gaskets that I paid $1.50 for at the HD!
I absolutely LOVE the start of my summer centerpiece.  It has a ways to go, but this is a great start and since I had everything on hand, with the exception of the candle holders, I spend a total of $3.15 for everything, not bad!

Blessings!

Saturday, March 31, 2012

March Madness - The Twins Big Reveal

THEY ARE DONE!!! I am SO excited to share the pictures with you.  If you read THIS post you remember the before and how I scored the tables for only $10 on craiglist...

After weeks of sanding, staining, priming, painting and polishing (all noted in my progress HERE ), these beauty's now look like this...
 OH MY GRACIOUS! Are they not the prettiest thing you have ever seen!
 I chose to keep all the hardware dark, which I L-O-V-E against the antique white.
 And I must say I am ABSOLUTELY giddy over how they look with the sofa and my new gallery wall
But the most exciting part is seeing these babies in the same room with the newly refurbed buffet (sorry for the terrible pictures, unfortunately I took them at night)...
I could not be happier with these 3 beautiful pieces of furniture and feel so accomplished knowing I did them myself!  So how about you, have you done any projects recently that you were super proud of?  Send me pictures, I would love to see!

Blessings,
hj

Friday, March 30, 2012

March Madness - Guest Bathroom

With March coming to a close I realized I had yet to complete the guest bathroom.  In an effort to use decor and fabric I had on hand I got to work.  Unfortunately this is about as far as I got at this point...  
I found a cute little vase I had gotten from my favorite little tearoom and added some ranunculus!
 I used some of my favorite fabric and made a no sew layered box curtain...
 On the wall next to the curtain is a sketch of our favorite little B&B in St Augustine, Fl!
There's so much more I want to do with this little room since it sits at the very front of the house, but that will have to wait until budget money (or free craigslist finds) allow.  My to do list presently includes:
  • Ornate Carpet that will fit the center area
  • Small cabinet to hold bathroom supplies
  • Artwork for over the toilet
  • Bold printed towels
Blessings!

Tuesday, March 27, 2012

Craigslist Treasures...

It's no secret in our house that I love craigslist!  I have found so many great deals, most recently our newly refurbed buffet that I scored for only $25.  I have been wanting to add chairs to our living room, but with a tight budget furniture shopping just isn't on the list of needs.  So enter's craigslist...

Meet Alice and Mabel, my newest projects!  I found Mabel (on the left) for FREE and Alice (on the right) was just $15.  The best part is that they both came from pet free, smoke free homes and they are surprisingly REALLY comfortable...
 Now comes the fun part, deciding how I want to upholster them!  The blue fabric has GOT TO GO!  Print vs solid, dark vs light, who knows.  For now the fabric swatches as camping out on the chairs so I can live with them for awhile.
Although the blue is HIDEOUS I do LOVE how these girls fit in the space.  They give the space a homey feel without obstructing the view out the back.
We still have a ways to go in the living room, but the new chairs are definitely helping!

Blessings!

March Madness - Buffy Big Reveal!

SHE'S DONE!  After a couple weeks of hard work stripping, sanding, staining, priming, painting, sealing...she is finally done and in her new home!  Just to refresh your memory....

BEFORE: 
AFTER: (Nasty laminate be gone...)


 She now has a beautiful dark stained top...


It's really hard to believe this baby was a $25 craigslist discard and now she is a beautiful little piece of furniture!  The work was all worth it!

Blessings!

Saturday, February 25, 2012

Fabulously Refurb...the twins!

Every now and then I stumble on a bargain that absolutely amazes me.  Meet the twins...er, well, one of the twins (forgot to photograph them together)...
I was actually going to check out a dining room table when I was introduced to these 2 beautiful end tables.  While on the surface they are in need of some love, they are well crafted pieces of furniture.  They also hold a secret, they have hidden storage (those are faux drawer fronts)....
 OH do you just love that!  They also have dual faux fronts on both ends so they can be turned either way.  And don't you just love the Hepplewhite hardware!
But perhaps the best part of all...they were $5 each...yep $10 for both!  I have had the twins for about a year now and just couldn't decide what to do with them, however with the recent addition of the buffet, all three pieces will coordinate.  EEEEEE, I am so excited!
 Stay tuned for the progress!