Showing posts with label vintage romantic room. Show all posts

Friday, May 4, 2012

Fab Refurb: Bedroom Dresser - Progress update 1

I have to apologize, I keep forgetting to take pictures during the day, so these are a little dark.  I promise the next set will be better :).

The primer is all dry and so I was able to lay down the first coat of paint.  I decided to use Rust-Oleum Heirloom White paint.  After the first coat the dresser was looking beautiful...
I adore those drawer fronts...
The bottom drawers were looking good...
The back detailing is beautiful...

After the first coat I sanded the entire piece down with 220 sand paper to get all the little bumps out, then came a light cleaning to remove all the sanding dust.  I decided to do another coat today and the finished product looks AMAZING!  Tomorrow I hope to add the clear coat and move this baby in to her new home!  Now on to find drawer pulls.

Blessings!

Wednesday, May 2, 2012

Fab Refurb: Bedroom Dresser

I am SO excited to share this refurb with you!  Since moving to NY we have been on the hunt for a dresser to go along with our vintage romantic inspired master bedroom.  I have been checking second hand stores and craigslist, but with a budget of only $50 it has not been easy.  Well while I was sick and stalking craigslist to pass the time, I spotted this baby for just $40 (yes it does have drawers, I took them out before I took the picture)...
I was beside myself when I got the email that I was the first one!  So helpful hubby headed out to pick it up for me.  He checked over the piece to make sure it was just cosmetic issues and hauled it home.  Once I was healthy enough I began the refurb with a good cleaning... 
I always wonder what a piece of furniture has seen in it's lifetime and I'm guessing this one has seen ALOT!  The doors were the worst, but it really just looked like a staining gone bad.  The top had water damage but just on the surface, nothing a good cleaning couldn't take care of...
The exterior drawers have been stripped and stained and stripped again so I decided they needed to be painted as well.  I will be changing the hardware as well, just not a fan of those drawer pulls...
The interior drawers were the nicest part.  I am guessing this is what the original piece looked like.  The jury is still out on whether they will be painted or not.  I just love the rich tones and with some wood conditioner they would sparkle!
Upon further inspection of the interior I found the LAYERS of paint and stian this dresser has seen.  After seeing this it was settled that this piece would be painted...
The legs were in great shape with the exception of a few chips.  Nothing a hammer, screw driver and a little patients couldn't take care of...
After a GOOD cleaning and several days of researching painting furniture I decided to use spray paint this time around.  I started with Rust-Oleum Primer...
After the first coat of primer you could really see the true beauty of this piece and all the little intricate details...
 Even the detail on the drawers could be seen a little better...
I decided to do two coats of primer since I was going from dark to Heirloom White.  I am getting so excited to see this piece finished...that will be a few days no doubt!

Blessings!

Tuesday, March 20, 2012

March Madness: Mr. & Mrs. Pillows!

I am SO excited to share this tutorial with you because it was super easy!

One of the additions we need to our bedroom is a few new pillows for our bed.  We decided to save money by using a comforter we've had in storage (sorry you'll have to wait to see it until the BIG reveal :), however we knew we would need accent pillows.  I searched Pinterest (of course!) and found these adorable pillows...
I knew I wanted one's just like them.  So I went on a hunt through the craft closet and found some leftover canvas from our little mans first birthday party, black sharpies and a bed pillow we had laying around.  

Here's the tutorial...

I started by finding a font I liked and printing out the words I needed.  I positioned them on the fabric and cut 3 equal size pieces of fabric for each pillow...
Since I don't own a light table, I decided to make one using a piece of sheet plastic I had on hand.  I taped the printed out word on the sheet plastic so it would stay in place...
 Using duck tape I stretched the canvas over the printed out word and taped it down...
Enter my light table source...okay I know a little ghetto but it works great!  To make my light table I placed a heavy object on one end of the sheet plastic, hung the end with the word over my work table and set the shadeless lamp on the floor just under the sheet plastic....
 Here's what it looks like when the light comes through the plastic!
Now it was just a matter of trace and color.  I have to admit this was ALOT of fun and super easy.  Be sure you stretch the fabric tight to make it easier to trace...
 After I finished I carefully went over the area's that needed to be darker and the lines that needed to be cleaned up...
Once I finished I was left with these three...
EEEEEEEEEE!!!! Can you hear my excitement!  All that was left was measuring down the material on each pillow.  I chose to leave the center pillow a little larger to keep from being to uniform.
I cut the bed pillow open and measured out the amount of foam I needed.  Then using No Sew fabric glue I glues together 3 of the 4 sides and let them dry (about 2 hours).  I stuffed the pillow and glued the last side together.
 After about 2 hours of drying time my pillows were done!  I L-O-V-E these and they are the perfect addition to our Vintage Romantic bedroom.
OH and as for WHY our center pillow is a treble/bass clef...well you will just have to wait and see :) (no that's not the comforter either).  The best part of these pillows is the cost, a big fat $0, zip, zilch!  Everything I used for this project I had on hand.

Blessings!

Monday, March 19, 2012

March Madness: Burlap Curtains!

After finding the dream design for our new vintage romantic bedroom it has been hard to focus on anything else.  Normally I would reveal the design, but for the fun of it I've decided to wait until April when the room complete.  

In the mean time here are a few projects I'm working on for our new bedroom design.  Today's project was Burlap Curtains.  I have been wanting to try this for some time now and finally decided to move on it since I had 40% off coupon to Joann Fabrics.  I was really excited when I arrived and the Burlap was on sale for $2.99 per yard!  I purchased 5 yards for a total of $8.97! 

I started by measuring out the burlap I needed for each panel.  Since the sides of the burlap were finished and I wanted a rough bottom, the only part I had to complete was the top.  After making my cuts I pulled out the iron and ironing board.  I made a large crease and iron it down.
 I ran a strip of Heat 'N Bond along the edge of each crease.
 Next it was just a matter of ironing each crease to bond the two sides together.
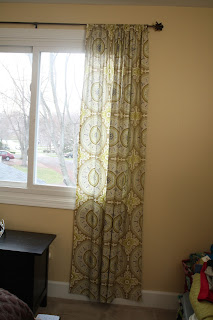
 While both panels cooled I took down the existing curtains.  These looked great in our last house, unfortunately I can't say the same for these yellowish-cream-rental house walls.  Not to mention they were a little short due to the windows being higher in this house.
 Thanks to my 40% off coupon, these babies (which were normally $9.99, on sale for $5.99) came to a total of $3.59!
 Just a few clips and the new curtains were up!
 I absolutely love these, they are so wistful and the billow at the bottom adds to the look!  They only took about 20 minutes to make!
Cost Breakdown:
Burlap - $8.97
Heat N Bond - $0 (on hand from dining room curtains)
Curtain Rings - $3.59

Total Curtain Project - $12.56!

Blessings,
hj