Monday, May 7, 2012

Monday Menu Planning


Since the pantry is undergoing a facelift, I have dubbed this week "Clear Out Cooking".  This means I am strictly making meals based on what I have on hand.  I thought this would be a challenge but surprisingly enough it was easy to come up with 2 weeks worth of menu's.  I can't wait to see how small the grocery bill will be this week!

Monday
Dinner with Small Group

Tuesday 
Main: Oven Baked Chicken / Sides: Couscous and Steamed Veggies

Wednesday
Game Night - Dinner with Small Group

Thursday
Main: Chili Lime Steak Salad

Friday
Main: Bar-b-que Chicken / Sides: Potatoes and Broccoli

Saturday
Main: Date Night (WOOHOO)!

Sunday
Main: Left Overs

Friday, May 4, 2012

Fab Refurb: Bedroom Dresser - Progress update 1

I have to apologize, I keep forgetting to take pictures during the day, so these are a little dark.  I promise the next set will be better :).

The primer is all dry and so I was able to lay down the first coat of paint.  I decided to use Rust-Oleum Heirloom White paint.  After the first coat the dresser was looking beautiful...
I adore those drawer fronts...
The bottom drawers were looking good...
The back detailing is beautiful...

After the first coat I sanded the entire piece down with 220 sand paper to get all the little bumps out, then came a light cleaning to remove all the sanding dust.  I decided to do another coat today and the finished product looks AMAZING!  Tomorrow I hope to add the clear coat and move this baby in to her new home!  Now on to find drawer pulls.

Blessings!

Thursday, May 3, 2012

DIY: Makeup Board

In our rental home we have one full bathroom, unfortunately the vanity is not very large (sorry for the yellow picture).  With daddy, mommy and baby plus overnight guests using this same space storage is a  huge issue....
In an effort to free up some space I decided to make a magnet board for my makeup.  After house hunting I found an old unused cookie sheet and some left over white spray paint.  It only took one good coat to cover the back side (sorry I only have the before)... 
Next I purchased some tiny heavy duty magnets for $2 a package at Joann's.  I pulled out my trusty glue gun and my already sorted make up and I was ready to get to glueing...
 I glued  a magnet to the back of each piece...
While the glue dried I decided to put lip sticks and brushes in a jar I already owned, but when I looked at it on the counter it just looked disorganized and U-G-L-Y!
So to the pantry I went!  I have seen several people use coffee beans, but around here those are a precious commodity, not to mention I wanted something lighter.  It only took a moment for me to spot some soup mix that, I'm sad to say, I have had for a LLLOOOONNNGGG time.  I knew the beans would be the perfect color in the bathroom (okay did that sound really funny to anyone else :))...

 After pouring the beans in the jar I added the brushed and lipstick back in and viola!  Much better...
The pan just ended up being the perfect size to squeeze inbetween the counter molding and the medicine cabinet, that's right that baby is just snuggly shoved in there with no screws or adhesive, go figure...
The white was just to plain so I decided to mod podge scrapbook paper over the top.  I used paper I had on hand and it was a perfect match for the bathroom.  I also made some little labels using stickers... 
I absolutely LOVE my makeup board!  It is easy access, out of the reach of little hands and free's up some much needed cabinet space.  Oh and the jar of beans ended up being a great addition...
 So what do you think, I would love to hear how you solve storage issues in your house.

Blessings!

UPDATE: You will need to use 2 magnets on the back of larger pieces like Bare Minerals containers.  

DIY: Menu Board

I confess I am one of those crazy menu planners and weekly I try to get my menu's up on the blog (that is when we are not dealing with the plague of sickness!).  Since I have a terrible memory I decided I needed a menu board in our kitchen.  If this were not a rental we would already have a chalkboard painted on the end of one of the cabinets, but since that is not an option I decided to make a hanging one.  

First task was to find something in the house I could use instead of purchasing something new.  I found a great piece of wood on one of the pantry shelves.  Since the pantry/coat closet (yes it is both, more on that another time) is getting a make over I knew I wouldn't be using it...
 So out to the garage this cute little board went.  Using some chalkboard spray paint I had I hand, I sprayed down one side.  I gave the board 2 heavy coats, allowing a day in between each coat.
After spraying the board I drilled two tiny holes at the top for a ribbon and viola!
Isn't it cute!  I am really surprised how easy this project was.  It is so much fun changing out the decor on the board weekly.  It is a nice addition to the kitchen (so sorry for the terrible lighting, forgot to get a daytime picture)...
Eventually I am hoping for a family command center in this area, but for now this is a much needed improvement.

Blessings!

Wednesday, May 2, 2012

Fab Refurb: Bedroom Dresser

I am SO excited to share this refurb with you!  Since moving to NY we have been on the hunt for a dresser to go along with our vintage romantic inspired master bedroom.  I have been checking second hand stores and craigslist, but with a budget of only $50 it has not been easy.  Well while I was sick and stalking craigslist to pass the time, I spotted this baby for just $40 (yes it does have drawers, I took them out before I took the picture)...
I was beside myself when I got the email that I was the first one!  So helpful hubby headed out to pick it up for me.  He checked over the piece to make sure it was just cosmetic issues and hauled it home.  Once I was healthy enough I began the refurb with a good cleaning... 
I always wonder what a piece of furniture has seen in it's lifetime and I'm guessing this one has seen ALOT!  The doors were the worst, but it really just looked like a staining gone bad.  The top had water damage but just on the surface, nothing a good cleaning couldn't take care of...
The exterior drawers have been stripped and stained and stripped again so I decided they needed to be painted as well.  I will be changing the hardware as well, just not a fan of those drawer pulls...
The interior drawers were the nicest part.  I am guessing this is what the original piece looked like.  The jury is still out on whether they will be painted or not.  I just love the rich tones and with some wood conditioner they would sparkle!
Upon further inspection of the interior I found the LAYERS of paint and stian this dresser has seen.  After seeing this it was settled that this piece would be painted...
The legs were in great shape with the exception of a few chips.  Nothing a hammer, screw driver and a little patients couldn't take care of...
After a GOOD cleaning and several days of researching painting furniture I decided to use spray paint this time around.  I started with Rust-Oleum Primer...
After the first coat of primer you could really see the true beauty of this piece and all the little intricate details...
 Even the detail on the drawers could be seen a little better...
I decided to do two coats of primer since I was going from dark to Heirloom White.  I am getting so excited to see this piece finished...that will be a few days no doubt!

Blessings!

A dreadful delay...

Well unfortunately for me the fabric I chose for my chairs just happens to be very popular, so today I received word that it is backordered until May 14th!  Okay so it's not that bad, but then again I have never been a very patient person :).  So sadly folks we have a dreadful delay on the chair recover project.  Hopefully soon!

Blessings!

Tuesday, May 1, 2012

Pinterest Project: A-door-able mat...

One of the many projects on my Pinterest list was this front door mat.  I absolutely love the nautical look and how it can withstand the elements (since here in NY we get a little of everything).  So I headed off to the HD to purchase the needed supplies.   

I was able to pick up the wood in the fencing department for just .85 cents a piece and the gentleman helping me was kind enough to cut them in half.  I purchased quarter-inch-thick manila rope, cheap paint brush and 2 quarts of Behr Semi-Transparent Weather Proofing wood stain.  

The first step was lining up my boards and sanding them down...
Using a ruler I measured and marked each piece for drill holes.  I chose to measure three inches in from the end of each piece...

Using a drill and a 3/8" bit I drilled holes into each piece.  This was a really exciting and super fun step for me as I've never actually drilled holes into anything before this project (I may or may not admit to running around the house trying to find others things to drill holes into :))...
In a matter of moments I had drilled all my holes...
After sanding down each of the holes, I was ready to stain the wood.  This step was not on the blog with the original plan, but I wanted to add some color to our boring rental front door.  After researching stains I decided to go with a tinted Semi-Transparent wood stain, this would add color and allow the wood grain to show through...
It's hard to see but this stain protects against sun, snow, frost, rain, wind and other elements...
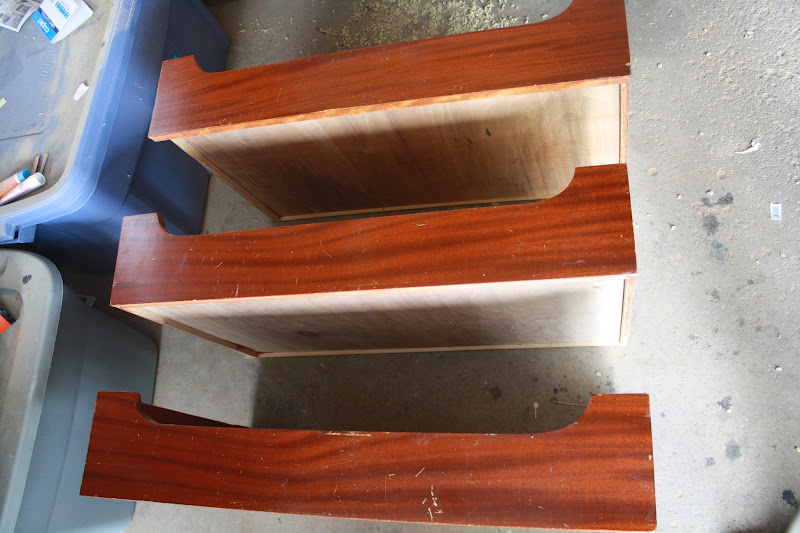
I chose to go with a blue stain, unfortunately the pictures don't do the color justice...
 After three coats of stain my wood pieces were ready to be tied together...
Unfortunately I didn't get a picture threading the manila rope through the holes.  

Side Note: when threading the rope through the holes it helps to wrap the end with duct tape to keep it from fraying.  Thread a good amount of rope through the first piece to ensure you will have enough to knot in between each piece.  After threading rope through the hole, make a knot.  Continue this process until each side is complete.  

I love how my mat turned out, although I would like if it were a little longer (just an excuse to make another one in the fall :)).  I love how the blue plays off of the siding on our rental home and who doesn't love a pair of Wellies to go along with it!
 And of course I had to make a new colorful door hanger.  I'm not sold on the orange ribbon or the sign in the middle, but since they were FREE (I had them on hand) they will work for now.
 The best part is I just prop this baby up when it rains and it gets a good cleaning.
So there you have it, an easy A-door-able DIY mat!

Blessings!