Showing posts with label refurb. Show all posts

Friday, May 4, 2012

Fab Refurb: Bedroom Dresser - Progress update 1

I have to apologize, I keep forgetting to take pictures during the day, so these are a little dark.  I promise the next set will be better :).

The primer is all dry and so I was able to lay down the first coat of paint.  I decided to use Rust-Oleum Heirloom White paint.  After the first coat the dresser was looking beautiful...
I adore those drawer fronts...
The bottom drawers were looking good...
The back detailing is beautiful...

After the first coat I sanded the entire piece down with 220 sand paper to get all the little bumps out, then came a light cleaning to remove all the sanding dust.  I decided to do another coat today and the finished product looks AMAZING!  Tomorrow I hope to add the clear coat and move this baby in to her new home!  Now on to find drawer pulls.

Blessings!

Wednesday, May 2, 2012

Fab Refurb: Bedroom Dresser

I am SO excited to share this refurb with you!  Since moving to NY we have been on the hunt for a dresser to go along with our vintage romantic inspired master bedroom.  I have been checking second hand stores and craigslist, but with a budget of only $50 it has not been easy.  Well while I was sick and stalking craigslist to pass the time, I spotted this baby for just $40 (yes it does have drawers, I took them out before I took the picture)...
I was beside myself when I got the email that I was the first one!  So helpful hubby headed out to pick it up for me.  He checked over the piece to make sure it was just cosmetic issues and hauled it home.  Once I was healthy enough I began the refurb with a good cleaning... 
I always wonder what a piece of furniture has seen in it's lifetime and I'm guessing this one has seen ALOT!  The doors were the worst, but it really just looked like a staining gone bad.  The top had water damage but just on the surface, nothing a good cleaning couldn't take care of...
The exterior drawers have been stripped and stained and stripped again so I decided they needed to be painted as well.  I will be changing the hardware as well, just not a fan of those drawer pulls...
The interior drawers were the nicest part.  I am guessing this is what the original piece looked like.  The jury is still out on whether they will be painted or not.  I just love the rich tones and with some wood conditioner they would sparkle!
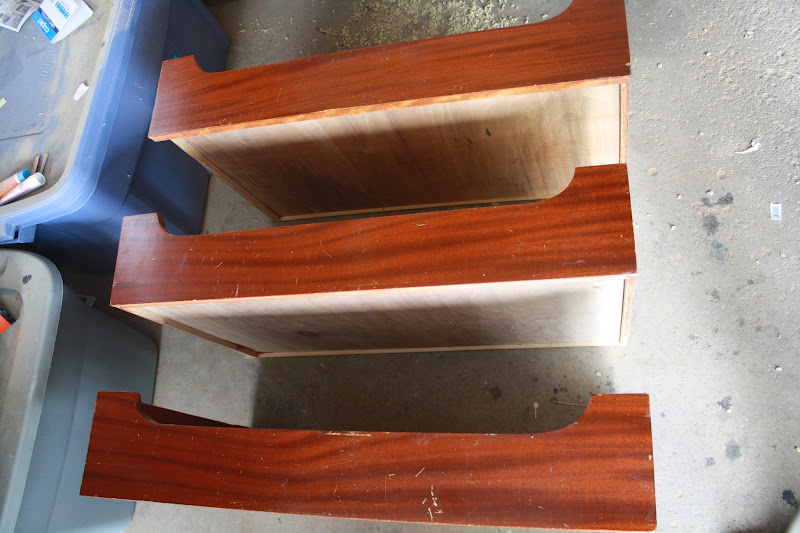
Upon further inspection of the interior I found the LAYERS of paint and stian this dresser has seen.  After seeing this it was settled that this piece would be painted...
The legs were in great shape with the exception of a few chips.  Nothing a hammer, screw driver and a little patients couldn't take care of...
After a GOOD cleaning and several days of researching painting furniture I decided to use spray paint this time around.  I started with Rust-Oleum Primer...
After the first coat of primer you could really see the true beauty of this piece and all the little intricate details...
 Even the detail on the drawers could be seen a little better...
I decided to do two coats of primer since I was going from dark to Heirloom White.  I am getting so excited to see this piece finished...that will be a few days no doubt!

Blessings!

A dreadful delay...

Well unfortunately for me the fabric I chose for my chairs just happens to be very popular, so today I received word that it is backordered until May 14th!  Okay so it's not that bad, but then again I have never been a very patient person :).  So sadly folks we have a dreadful delay on the chair recover project.  Hopefully soon!

Blessings!

Saturday, March 31, 2012

March Madness - The Twins Big Reveal

THEY ARE DONE!!! I am SO excited to share the pictures with you.  If you read THIS post you remember the before and how I scored the tables for only $10 on craiglist...

After weeks of sanding, staining, priming, painting and polishing (all noted in my progress HERE ), these beauty's now look like this...
 OH MY GRACIOUS! Are they not the prettiest thing you have ever seen!
 I chose to keep all the hardware dark, which I L-O-V-E against the antique white.
 And I must say I am ABSOLUTELY giddy over how they look with the sofa and my new gallery wall
But the most exciting part is seeing these babies in the same room with the newly refurbed buffet (sorry for the terrible pictures, unfortunately I took them at night)...
I could not be happier with these 3 beautiful pieces of furniture and feel so accomplished knowing I did them myself!  So how about you, have you done any projects recently that you were super proud of?  Send me pictures, I would love to see!

Blessings,
hj

Tuesday, March 27, 2012

March Madness - Buffy Big Reveal!

SHE'S DONE!  After a couple weeks of hard work stripping, sanding, staining, priming, painting, sealing...she is finally done and in her new home!  Just to refresh your memory....

BEFORE: 
AFTER: (Nasty laminate be gone...)


 She now has a beautiful dark stained top...


It's really hard to believe this baby was a $25 craigslist discard and now she is a beautiful little piece of furniture!  The work was all worth it!

Blessings!

Monday, March 12, 2012

March Madness: 220 reasons

When it comes to sanding projects I will be the first to admit that I am no expert.  So when I decided to refurb buffy and the twins, I wanted to be sure I did a good a job.  I turned to the internet and several DIY blogs for suggestions on the best way to refurb wood and veneer furniture.  It didn't take long before I landed on 2 different Pro-Grade sandpapers, meet 80 and 220...

I started with 80 Grit sandpaper which is very course.  This stuff works wonders, even on veneer, but does leave a very rough surface.  Enter 220 Grit!  This stuff is, in a word, I-N-C-R-E-D-I-B-L-E!   220 Grit is very fine and meant to smooth out rough surfaces.  Within no time all three pieces went from gritty and rough to smooth and flush.  It's hard to tell from photo's but the left was sanded with 80 Grit and the right with 80 and 220 Grit...
The door on the left sanded with 80, the door on the right sanded with 80 and 220...
The proof is not in the pictures, but in the feel.  The smooth finish of all 3 pieces made them feel like new.
Along the way I'm learning just how messy sanding projects are.  
With the sanding projects complete I can move on to painting, priming and staining!  These babies are getting SO CLOSE to being done!

Blessings

Thursday, March 1, 2012

March Madness....

Happy First Day of March!

It is definitely March Madness around our house and I'm not talking about basketball either!  Our March Madness is all the little projects I have going on at one time.  So for the month of March it is all about completion, not starting anything new until I have completed what is already in the works.  Incase you are just joining us, here's an update:

Buffy the beautiful Buffet and the Twins:
Yes they all have names.  So far these babies have been wiped down with a good cleaner, vacuumed out and had all their doors and hardware removed, I was shocked at how much Buffy sparkled after a good cleaning!  For the moment they are awaiting a good sanding and removal of Buffy's laminate covering.  Since our garage is the hub for all our refurbing, and it is not heated, the process has been on hold.  As much as I want to get it done a 20 degree workspace is not my idea of fun...BRRRRR.  Unfortunately the living room decor is on hold until these 3 are complete, so there is certainly incentive to getting them done!

Dining Room Curtains:
Yes, I have been trying to get to the dining room curtains since we moved in!  The fabric has been purchased, now it's just a matter of getting them done!

Spice Jars:
With some projects you learn what NOT to do, well the spice jars have been one of those.  The jars are just about done, however I managed to ruin 4 of the lids, it was a bit of a spray painting tragedy but more on that later.  Not to worry, I did find replacement lids and they are currently drying.  SO once the lids are finished these babies will only need the final coat of sealer and then they will officially be done :)

Gallery Wall:
This ones been in the works since before we moved...OUI!  We have so many great pictures from our family photo shoot this past fall that is has been near impossible to decide on just a few.  After 5 months I think I finally have it down, now I just need to finish the frames!

Easter Decor:

It's March, time for Valentines to pack up and Easter to move in!  Spring is on it's way :)

Master Bedroom Overhaul:

Our Master Bedroom has been going through an identity crisis since last Summer.  As much as I have had my heart set on a yellow and grey color pallet, it just doesn't jive with the paint color in our rental or our bed frame.  Since I am not getting rid of either anytime soon, the color scheme has been turned on it's head.  I am pretty excited!

Guest Bathroom Beautification:

Presently this is a clean slate, OOOOO I love a clean slate!  I am challenging myself to decorate this little area with as much existing decor as possible.  The storyboard is almost complete, so we'll just see what I end up with!

So there ya go, my own personal MARCH MADNESS.  Let's just see where I end up when all is said and done, 30 days and lots of projects.  How about you, what do you have planned for March?

Blessings,
hj

Saturday, February 25, 2012

Fabulously Refurb...the twins!

Every now and then I stumble on a bargain that absolutely amazes me.  Meet the twins...er, well, one of the twins (forgot to photograph them together)...
I was actually going to check out a dining room table when I was introduced to these 2 beautiful end tables.  While on the surface they are in need of some love, they are well crafted pieces of furniture.  They also hold a secret, they have hidden storage (those are faux drawer fronts)....
 OH do you just love that!  They also have dual faux fronts on both ends so they can be turned either way.  And don't you just love the Hepplewhite hardware!
But perhaps the best part of all...they were $5 each...yep $10 for both!  I have had the twins for about a year now and just couldn't decide what to do with them, however with the recent addition of the buffet, all three pieces will coordinate.  EEEEEE, I am so excited!
 Stay tuned for the progress!

Fabulously Refurb...Buffet

Say hello to my beautiful new buffet, isn't she pretty....
well she will be when I'm done with her :).  For years I have been on the hunt for a buffet, but never could find a piece under $100.  So imagine my delight when I saw this beauty on Craigslist for $30!  The moment I saw this piece in person I was in love and since she needs a little facelift I was able to get her for only $25!  WOW!  The picture doesn't do her justice, she has 2 side doors with shelves inside, 3 deep middle drawers and one very L-O-N-G drawer across the top.  Goodness, just talking about her makes me so excited!  And the plans for refurb....ooooo you will just have to stay tuned for that one!